Pages

Thursday, July 30, 2015

Furniture Restoration Made Easy You Need to Know


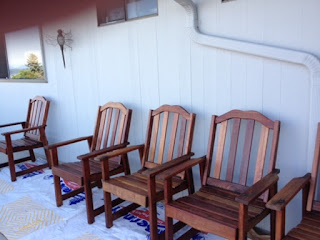
Restoration prolongs the lifespan of wood furniture to spare homeowners the trouble and expense of acquiring new furniture every so often. The first step to furniture restoration is cleaning. If a piece of furniture is not clean, no amount of wax or oil will make a difference.


7 Easy Steps in Restoring Old Wood Furniture


1. First, clean the furniture with a good wood cleaner. Some brands of oil soap work many times with a fine grade of steel wool. You will want to use a very light touch with the steel wool until you have discovered how dirty or soiled the furniture is. A lot of time a wax buildup is a part of the problem. Allow furniture to dry. There are other mixtures and solutions available on the market.

2. Once the furniture is dry, the surface may appear to be robbed of all color but this will depend on the type of finish and type of wood. Any furniture oil is good to go. Start oiling the wood by putting the oil in a bowl and painting it on the wood. Let the oil soak in. You may need to do this several times. Once you have an even look to the wood finish, repeat the same procedure with the use of lemon oil that you buy at the grocery store. But use it with a fine steel wool, going over all the wood. This will take down any uneven places and get the wood ready for the next step, which is the Tung oil. .

3. The purpose of Tung oil is seal the much hydrated piece of wood furniture. Go over the furniture with tung oil. A light layer will do. Let this set for about six hours and then repeat the process. Tung oil is the safest way to take care of furniture, and it can be used in almost every case. No harmful fumes to breathe.

4. After you have cleaned, oiled and sealed the piece of furniture, the final step is to wax it. Wax it several times a year and your furniture will give you a lifetime of use and can be passed on to generations after generations.

5. If you want a brighter shine on your furniture, you can go for varnish instead of wax. In that case, start by washing an inconspicuous part of a piece with soapy water to see what comes off. Then flow on semi-paste stripper, heavily but gently, with a rag swab. Wait an hour and when the chemical has raised the paint, push off the coating. When almost all the old finish is safely in the goo bucket, ease off the remainder with No. 2 steel wool and rub the piece dry with a rag.

6. Remove the softened paint with wooden scrapers, string, and a wooden-handled brush, let the surface dry, and brush any remaining gunk out of the crevices with the toothbrush. Allow the article you’re working on to dry for a day or more. Then rub it with No. 2 steel wool. Finally, dust the piece well with a rag, giving special attention to details.

7. Let the finished job dry a day before you varnish it, but you can get the same effect by rubbing and dusting a surface carefully with a cloth. Then swab on the finish with a lint-less rag. Make haste slowly, work the coating in well and be sure that no excess is left on corners and edges. Let the piece dry thoroughly, dust it again, and apply another layer.

Note:

Repeat the whole process as often as you want but keep those coats light! The result will be a beautiful low-sheen protective coating, very hard and waterproof, which looks and feels like an expensive oil finish.

Friday, July 17, 2015

Common Ways of Making Repairs to Wood Furniture


Furniture Refinishing Washington

Wood furniture crafted as dressers, shelves, beds tables or chairs, wood are made of a versatile and durable material. But after a while, such furniture inevitably develops wear and tear and lessens its appeal or their function. If you get the urge to throw this away, don’t. Wood furniture can be easily fixed. There are plenty of products on the market to fix scratches on wood. If you are in a hurry you might even use crayons, nuts or iodine to fix minor problems.


There many common ways of making repairs to wooden furniture, including those to chairs, doors, drawers, caning and mirror frames. Different techniques are needed for each type of fix. But it’s worth remembering that all wooden furniture has one thing in common: joints. The joints then are a good place to start in furniture repair.


Leather Upholstery Repair Washington


All furniture is put together in a series of joints, and structural problems often involve joint weakening or failure. Some joints are simple, some complicated, some types stronger than the others. The joints used in good wooden furniture are usually stronger than those in cheap pieces, but age and abuse can take their toll even when the original construction was good. To prevent more serious damage, all joints should be repaired as soon as possible when they loosen or separate.


Take the broken part and a similar undamaged part to the mill work or woodworking shop for duplication. Carefully clean the old adhesive from the joints. Then reassemble the chair with the new part, gluing each joint. Clamp the chair with strap clamps until the adhesive dries, and then refinish the chair completely.


Outdoor chairs made with wooden slats can be repaired the same way, but the slats can usually be replaced with wide moldings or thin boards. To replace a broken slat, cut and shape a piece of wide molding or a board to fit the frame. If the slats are fastened with screws, drill screw holes in the new slat and attach it with the old screws or matching new ones. If they're fastened with rivets, drill the old rivets out and replace them with self-tapping or pan-head sheet metal screws.


If the wood furniture has parts made of leather, it is important to identify your furniture's leather type before doing the repair work. This is to determine if the leather is pigmented or Aniline. The repair procedure is directly related to the leather type.


Once you have determined what to use and avoid, rub olive oil, baby oil or saddle oil into the scratch of the leather surface using a cotton swab applicator. After applying it directly to the scratch, rub it into the surrounding leather with a circular motion. Allow the oil to dry for an hour. If the scratch has not repaired itself, repeat the step or move on to the next one. As with all steps, test this in an inconspicuous area first as oil may absorb into the leather causing it to stain or darken.


Then dampen a cotton cloth and place the slightly damp cloth onto the scratched area. Allow the moisture to soak into the scratch slightly. Note than this particular process work only on some aniline leather types, such as pull-up and possibly bi-cast. Press a warm iron against the damp cloth. The heat and the moisture may bring out the natural oil in the leather. If it does, the scratch may heal itself as a result. Hold the iron on for 10 seconds.  Remove it, and look at the scratch. If it seems to have disappeared, dry off the leather and prepare to use as normal. If the scratch is still there, repeat the step with the iron once more.

Friday, June 26, 2015

Antique Restoration Do's and Dont's We Need To Know

Antique Restoration Washington

The methods of care for or restoration of antique furniture have changed over the years. Basically, antique furniture should not be cared for or repaired in the same manner as modern home furnishings. This is because the use of regular polishes, adhesives, fasteners and finishes can dramatically diminish the current and future value of such pieces.

The idea that antique item needed to be fed with oil to keep from drying out is a myth. Wood does not dry out from the lack of oil but rather from the lack of moisture. As such, storage in hot dry areas such as an attic should be kept to a minimum. In the same manner, furniture oils will temporarily enhance the finish and appearance, but can contribute to the degradation of the finish over time as oils leave a residue that can attract dust and dirt build up.


The preferred method of maintaining a varnished finish is a coat of high quality paste wax. Furniture paste wax is stable and long lasting. It will provide protection from moisture and dust and is not permanent. 

A thin coat of wax applied following the manufacturers recommendation annually will help protect your antique furniture's finish. In between waxing, dusting with a soft, lint free cloth on a regular basis. Dampen the cloth slightly and turn frequently. A dry rag can cause scratches when dusting. The reason is that wax may not be appropriate for surfaces with a deteriorating finish. Silicone-based polishes should be avoided as well since silicone can penetrate the finish and will cause problems with future furniture restoration or repairs.

With time, brass and copper hardware will acquire a soft patina that may appear to some as unattractive. Brass and copper hardware on historical and other valuable antiques should not be polished to remove the tarnished appearance. The original finish and patina should be retained on the hardware including handles, knobs, hinges, pulls and escutcheons.


When you need to move your antique furniture, you should check for loose or damaged joints. Chairs should always be carried by the seat rails as opposed to the back splat, top rail or arms. Tables should be carried by the apron or legs instead of the top which could pull loose from the base. Large pieces should always be lifted and never dragged across the floor. When transporting your antique furniture it's best to first remove shelves, doors and drawers. Protect glass doors with moving blankets or other adequate padding. Large items should be transported on their back or top, preferably their back. Marble tops should be removed and transported vertically. A marble top transported flat can crack easily. Mirrors and glass should also be transported and stored vertically.

Maintaining the original aged finish of antique furniture is essential to their restorations. This can be achieved if you avoid placing the antique furniture in front of a window or direct sunlight, near air conditioning and heating vents, fireplaces and stoves. If you spill any harsh liquid on them, blot up the spill immediately.  And then dust the furniture regularly using a lint-free cloth. 

Your antique furniture is also affected by the amount of moisture in the air. Changes in relative humidity can cause wood to expand and contract. This expansion and contraction can cause glue joints to loosen, drawers and doors to drag or become stuck in their opening. Extended periods of high humidity can lead to mold growth, rot and insect infestation. 

The use of a humidifier or dehumidifier is recommended to help maintain the relative humidity and minimize the adverse effects that moisture can have on your valuable antique furniture.

Wednesday, June 17, 2015

How to Refinish Your Old Wood Furniture


There are always heirloom objects sitting around the house that belong to earlier generations.  We hate to throw them away both for sentimental reasons and the knowledge that, when you fix the wear and tear, these objects can still be of value and function. For example, the old chair made of rare wood that your great grandparents left would be a great furniture showpiece if you do something about the frayed finish and the scratches. Even recently acquired pieces that look old and rickety can serve you well if proper refinishing furniture is done on them. So, instead of tossing your old wood furniture away, taking on a refinishing project would be a great idea. 

furniture restoration washington


Here’s how you can refinish your old wood furniture to make them look like new.